Changing the Name of a Session
Step 1. Log into Management DashboardLog into your ticketing management dashboard. Your user account must have the proper permissions to edit product details.
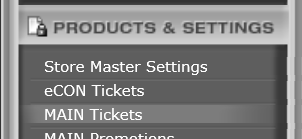
Step 2. Go to Category Listings for Main or Econ under Products & SettingsIf the product containing the session you want to change is a main store product, click on Main Tickets. If it's an affiliate/econsignment product, click on eCON Tickets
 Step 3. Go to Products List of Category
Select the category of the product containing the session you want to change.
Step 4. Go to Product DetailWhen you click on the category (from Step 3) you will be presented with a list of products contained in that category. Click on the name of the product containing the session you want to change.
Step 5. Go to SchedulerScroll down towards the bottom of the form and click on the link that says, "Click Here to Add/Edit/View Season Dates and Capacities".
Step 6. Select SessionScroll down to where you see the sessions belonging to this product. In the "Day" column, click on the number of the session you want to change the name for. This will load the form at the top of the page with the details of that session.
Step 7. Rename Existing SessionIn the form, look for the field labelled, "Rename Existing Session:". Enter the new name of the session that you would like. Click on submit and the session name will change. You can do this over a range of dates if you'd like. Just be careful you validate the form with the correct date ranges, capacities, price codes, etc.


